

📸 How I Turn My Photography Into Greeting Cards & Art Prints (Step-by-Step)
Taking photos has always come naturally to me. It’s never something I plan — it’s more like a spontaneous act. Whether I’m walking by the sea or exploring a quiet path, when the light hits just right or the scenery feels alive, I reach for my camera.
Over time, I realized that these moments — captured through my lens — weren’t just memories. They had the potential to become something more: art to display, share, and gift.
In this post, I’ll walk you through exactly how I turn my photographs into greeting cards and art prints, using a simple, minimalist approach that still feels intentional and high-quality. I’ll also share how I make my products both accessible and personal.
🧭 Step 1: Capturing the Shot (Trusting Your Eye)
I use a Canon Rebel T7, but I truly believe the best camera is the one you have with you. Sometimes it’s my phone, especially if the moment is fleeting.
Here are a few tips I follow when shooting:
Don’t overthink the setup. Natural lighting and organic framing are often better than over-posing.
Shoot during golden hour (just after sunrise or before sunset) for the softest, most flattering light.
Take multiple shots, even if it looks perfect — small shifts in angle make a big difference later.
Look for emotion or story, not just beauty. A quiet harbor, a forgotten tower, a winding path — these tell stories people connect with.
🌿 Tip: Don’t wait for the “perfect” location — some of my favorite shots happened unexpectedly during everyday walks.
🎨 Step 2: Designing the Cards (Using Canva for a Minimalist Touch)
Once I’ve selected a photo I love, I move into the design phase. I use Canva, a free and easy-to-use design platform that works beautifully for product mockups and layout design.
Here’s how I design my greeting cards:
Keep it minimal. I prefer a clean aesthetic — the photo takes center stage.
I include a small line of text in elegant font at the bottom of the card, usually the name or location of where the photo was taken. It adds context and makes the piece more personal.
For the inside of the cards, I usually leave them blank, so they can be used for any occasion — or add a soft message, like “thank you,” depending on the design.
🖼️ You can view some of my finished card designs here:
👉 Thank You Card – Neutral Design
👉 Funchal Port Card – Travel-Inspired
👉 Renvyle Tower Card – Irish History & Landscape
🖼️ Step 3: Creating Art Prints (Offering Framed & Unframed Options)
For art prints, I want customers to have flexibility — both in style and price — so I offer two versions:
Unframed Prints — Ideal for customers who want to use their own frame or keep it budget-friendly. I use high-quality lustre or matte paper through my print-on-demand partner to ensure vibrant color and durability.
Framed Prints — These are ready to hang and make beautiful gifts. The frame style is kept simple (black or natural wood) to let the photo shine.
🖼️ View examples from my shop:
👉 Framed Print – Nature Landscape
👉 Unframed Print – Nature Photography
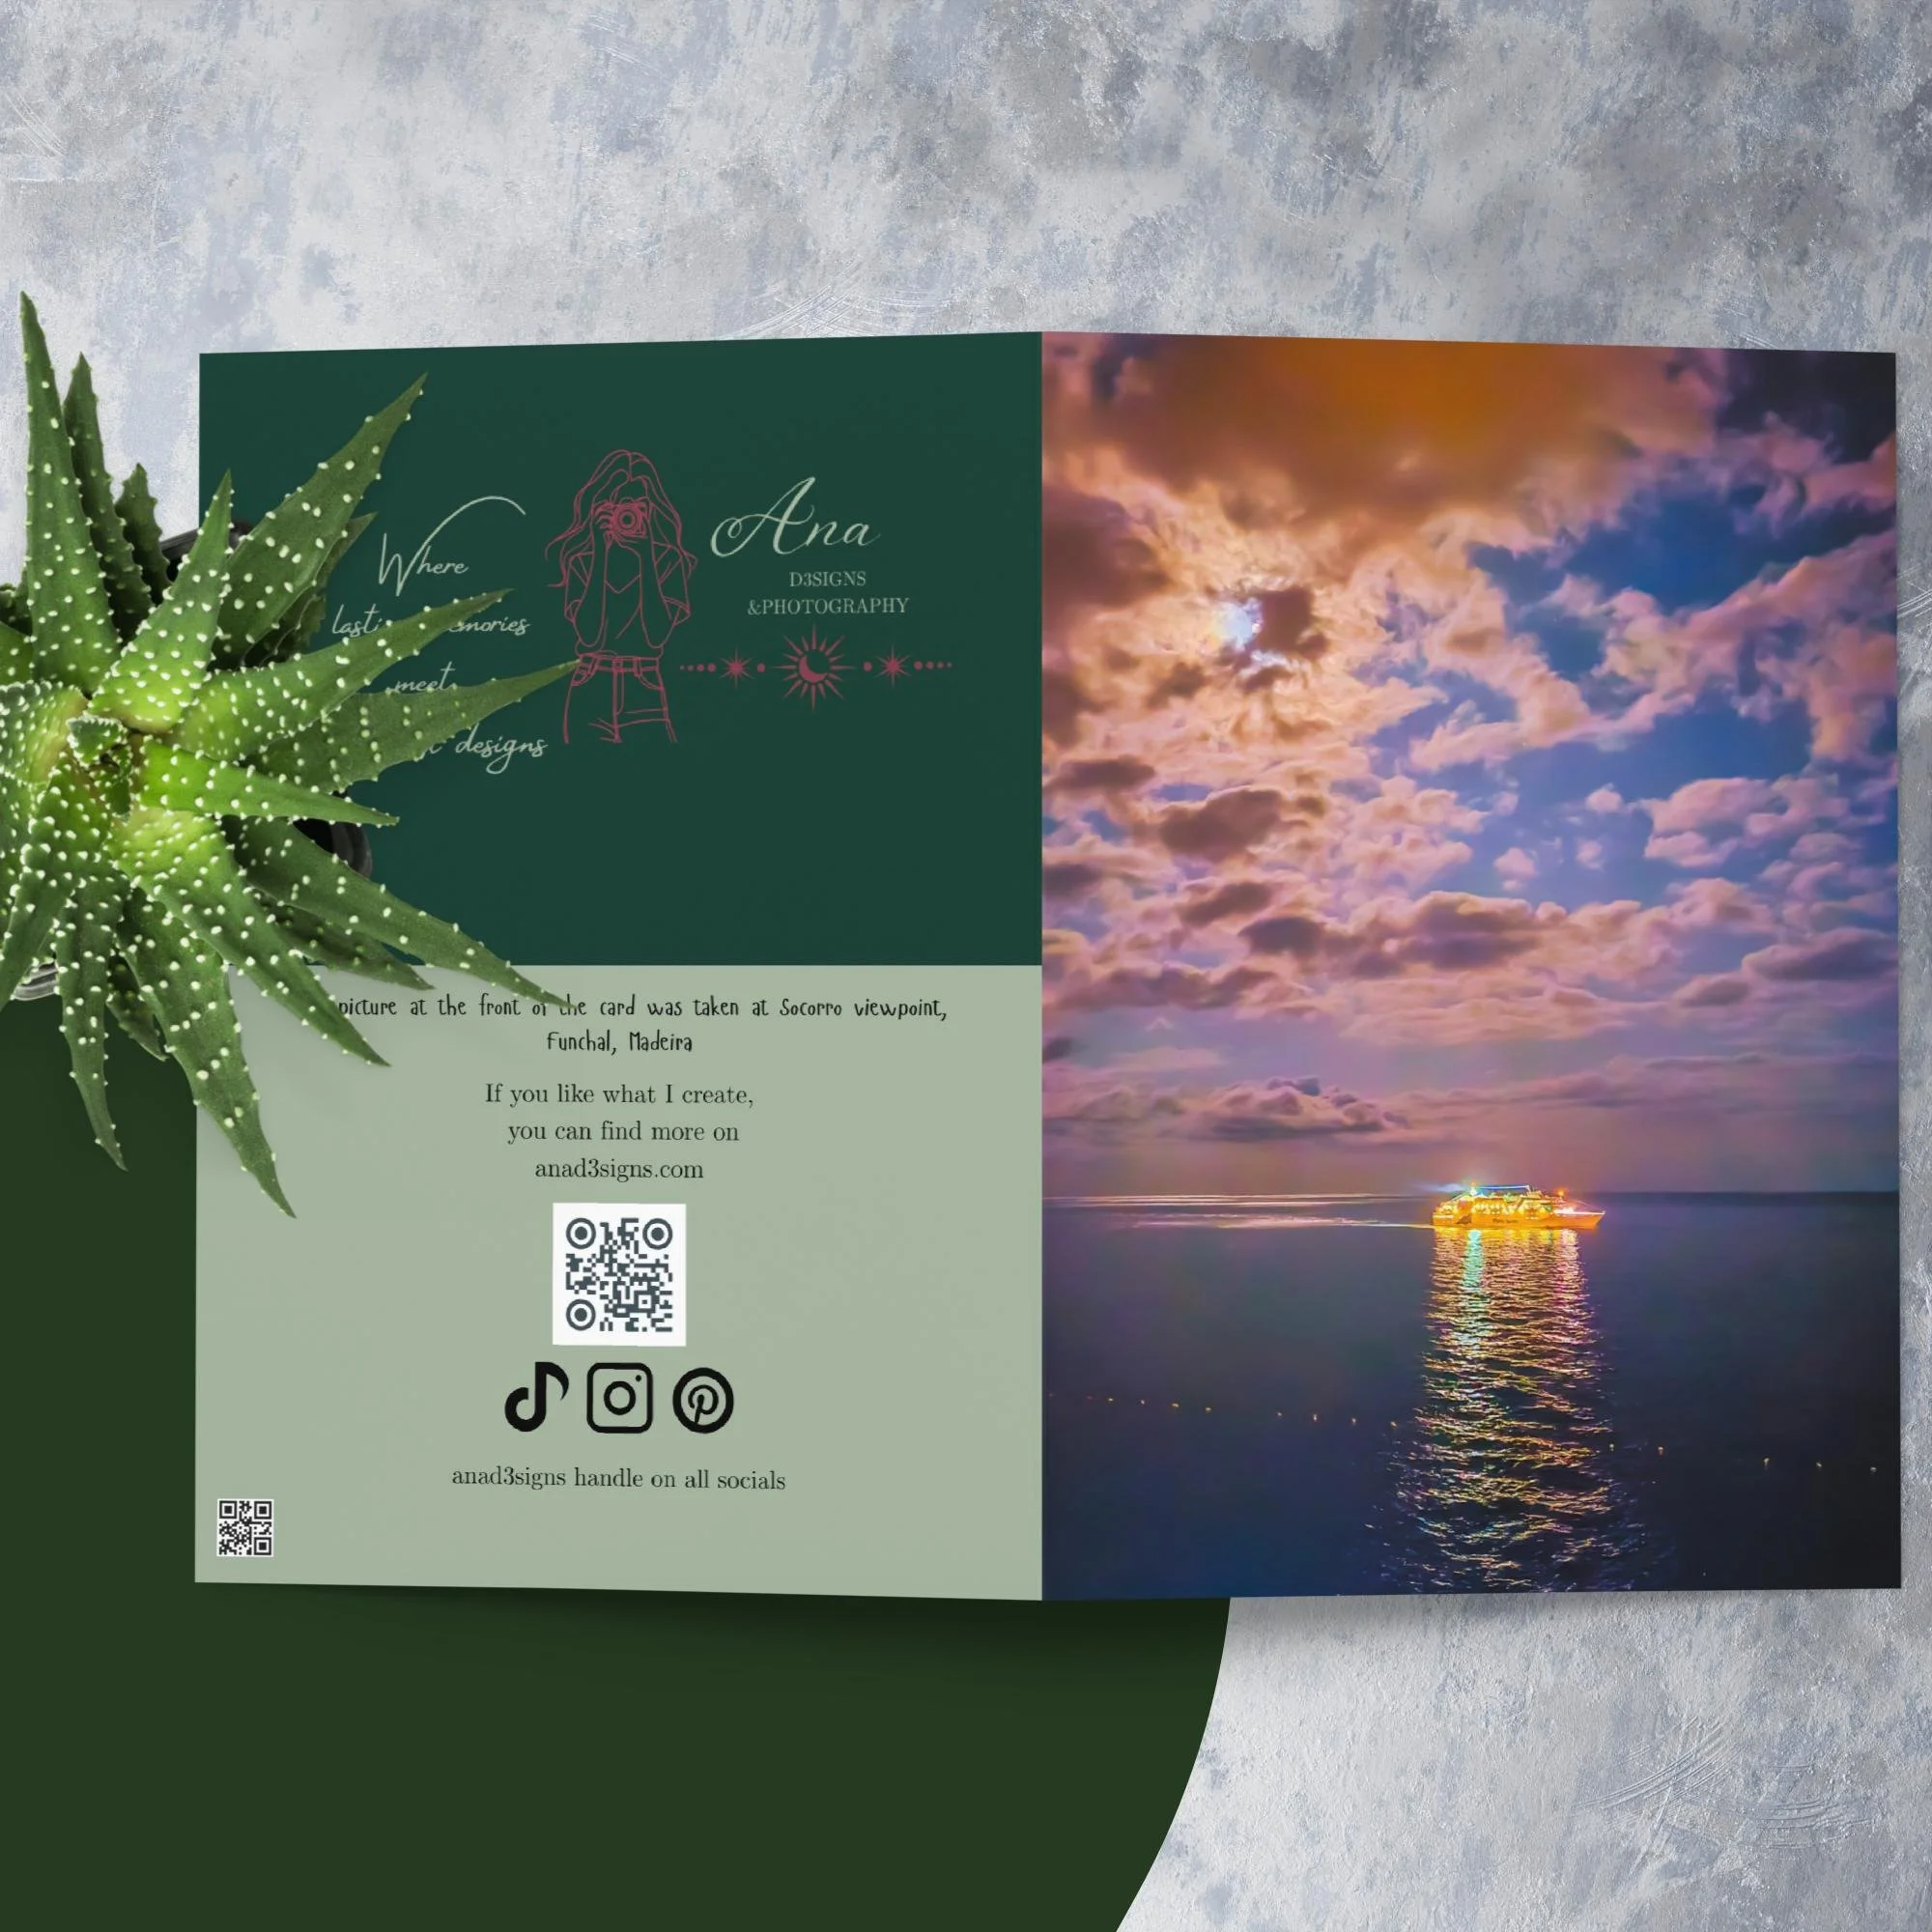
🖋️ Designing the Back of My Greeting Cards (Branding with Intention)
One small but important detail I include in all my greeting cards is a custom-designed back. I created this design in Canva as well, and I use the same layout (or slight variations) across my entire card collection to keep things cohesive.
The back includes:
My brand name and logo
A small message or signature line (depending on the card)
And most importantly: QR codes that link directly to my website and Instagram
This way, anyone who receives the card can easily discover more of my work, follow along with my journey, or even shop if they love the design. It’s a soft but powerful way to turn every card into a tiny ambassador for my brand — while still keeping the focus on the message and the photo itself.
🌿 Tip for fellow creators: If you're selling physical products, include at least one QR code on your packaging or branding materials — it's simple to make and super effective for connection and traffic.
💡 Final Tips for Creatives:
If you’re thinking of turning your own photos into products, here are a few tips from my experience:
Start with what you have. You don’t need a professional setup to create meaningful work.
Use Canva or similar tools for layouts — it makes designing so much less overwhelming.
Don’t overdo the branding. Let your photo speak for itself.
Offer variety, but keep it cohesive. Two options (framed/unframed) is enough to give customers choice without overwhelming them.
Keep your listings personal. Share where the photo was taken or what it means to you — people love to know the story behind the art.
💬 Why I Love This Process
There’s something really grounding about capturing a moment, then slowly turning it into something tangible that others can enjoy. It’s my way of blending creativity, intention, and healing — and it allows others to bring a piece of that energy into their space or gift it to someone they love.
I hope this gave you insight and inspiration — whether you're a creative looking to try something new, or someone who simply loves supporting small handmade shops.
🛒 Feel free to explore more of my prints and cards in my shop!